

Abrasive Sponge Manufacturer Shares Expert Tips for Achieving a Smooth Finish
2026-10-15
Getting a perfectly smooth surface isn’t just about elbow grease—it’s about using the right abrasive sponge and knowing how to work with it. In this guide, SHENZHEN SUN ABRASIVES, a leading abrasive sponge manufacturer, shares practical, shop-tested tips that go beyond the usual advice. Whether you're prepping wood, metal, or composite, these insights will help you avoid swirl marks, extend pad life, and achieve that flawless finish you’ve been chasing.
The Grit You Pick Determines the Finish You Get
Sandpaper isn't one-size-fits-all. Start with 80 grit and you'll chew through material fast, but leave deep scratches that demand more work later. Jump straight to 220 and you might spend an hour just to dull a surface that was never truly flat. The sequence matters more than most folks realize.
A common mistake is skipping grits. Moving from 60 to 120 feels faster, but those 60-grit valleys don't disappear—they just get polished at the edges. You end up with a finish that looks acceptable in dim light but reveals ugly cross-grain marks under direct sun. Going 60, 80, 120, 180, then 220 removes each previous pattern before the next one gets a chance.
For metal, the same logic applies. A 400-grit brushed finish on stainless steel isn't simply fine—it's the result of not rushing past 180 and 240. Pick the wrong starting grit and you'll burn through discs trying to erase mistakes. Pick the right progression and the final pass almost feels like polishing, not sanding.
Wet Sanding Is the Dust-Free Route to a Glassy Surface
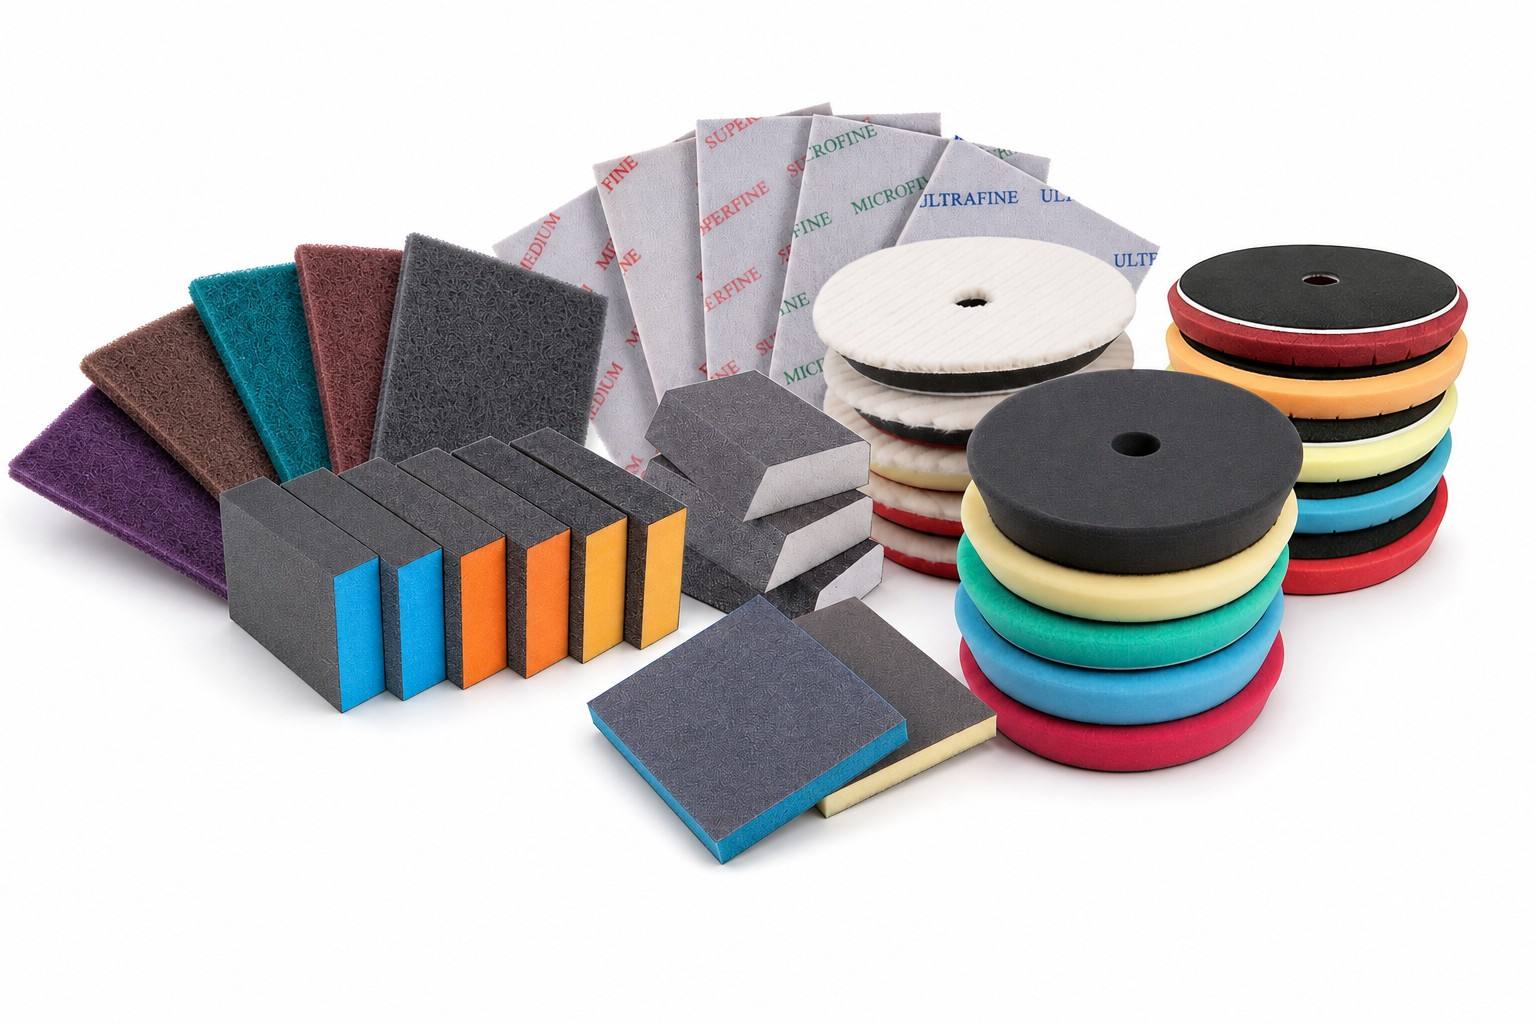
Wet sanding swaps airborne dust for a manageable slurry, keeping your workspace cleaner and your lungs happier. By keeping the surface and abrasive wet, the paper glides instead of clogging, so you can work through fine scratches without generating a cloud.
The real payoff comes once you move through the grits. Start around 1000 or 1200 to level orange peel or imperfections, then step to 1500, 2000, and 3000. Add a drop of dish soap to the water bucket to break surface tension and wash away residue as you sand. A soft block or foam pad helps keep pressure even, especially on curved panels.
You'll know it's working when the surface turns uniformly dull and the water sheets off instead of beading. From there, a compound and polish step removes the micro-scratches and reveals a deep, glass-like finish. It's slower than dry sanding, but the lack of dust and the final clarity are worth the extra time.
Pressing Harder Wastes Effort—Here's What to Do Instead
Most of us equate effort with results, so when something isn't working we double down. But extra force often creates more friction: you grip the pen tighter, your handwriting gets worse; you chase the deadline harder, your thinking narrows. The waste isn't from lack of trying—it's from trying in the same direction that already failed.
What works instead is a deliberate pause. Step back just enough to see the actual bottleneck. Is the path blocked because of a missing skill, a wrong assumption, or simple fatigue? Once you name it, you can redirect the energy you were pouring into brute force into a smarter move: ask one precise question, remove one unnecessary step, or rest for ten minutes. That often unlocks more progress than hours of strained effort.
Think of it like a stuck lid. Pressing down harder only seals it tighter. But a light tap on the edge or running it under warm water breaks the seal with almost no effort. Your hardest problems usually respond the same way—less force, more finesse.
A Quick Rinse Between Passes Stops Scratches Before They Start
Spent compound and loosened clear coat don't just disappear—they sit on the paint until the next pad pass grinds them back in. A quick rinse between sections washes that abrasive soup away, so the pad never has to drag old grit across fresh paint. It's the cheapest scratch prevention you'll find.
Keep the water pressure low and just let it flood the panel. You're not trying to strip protection or blast off embedded contamination; you're simply clearing the loose particles that the previous polishing cycle left behind. Ten seconds of rinse per pass beats an hour of correction later.
Skipping Grits Is the Fastest Way to Ruin a Smooth Finish
When you rush into painting or staining without taking the time to properly sand and clean the surface, you're asking for trouble. Skipping grits might feel like a shortcut, but it leaves behind scratches and uneven patches that show up immediately under the first coat. The result is a finish that looks rough, blotchy, and far from professional—no matter how carefully you apply the topcoat.
Each grit level exists for a reason: coarse paper removes material and levels imperfections, while finer grits erase the marks left behind by the previous step. If you jump from 80-grit straight to 220-grit, those deep scratches from the coarse paper are never fully removed. They simply hide under the surface until the stain or paint highlights them. The only way to fix it is to strip everything down and start over, which costs more time than doing it right the first time.
A smooth finish isn't about using the most expensive products or applying extra coats. It's about patience with the preparation. Work through the grits in order, wipe the surface clean between each step, and you'll end up with a surface that feels as good as it looks. Skip that process, and you'll be staring at a ruined finish wondering where it all went wrong.
Don't Rush the Edges—They Show Every Mistake
Most people treat edges as an afterthought, a quick pass before cleanup. That's exactly where the trouble starts. A rushed corner holds excess paint, uneven caulk, or a sanded-through veneer, and every one of those flaws becomes obvious the moment light hits the surface at an angle. Slow down only at the edges and the whole job suddenly looks steadier.
The trick is to treat the border as its own task, not the tail end of the main pass. Use less material, keep your strokes deliberate, and inspect from a low angle before moving on. If the edge looks clean before it dries, it will look clean after—and that's what separates a nervous finish from a confident one.
FAQ
Pressing too hard and rushing through grits. A light, consistent touch and gradual progression from coarse to fine matter far more than brute force.
Start with the coarsest grit that removes major defects without gouging, then step through medium and fine. If you can catch a scratch with your fingernail, you're not ready to move up.
Many work both ways, but wet sanding reduces dust and clogging, which helps achieve a finer finish. Just check the sponge type first—some break down in water.
Fold or tear the sponge to create a smaller, flexible edge. Put a fingertip behind the abrasive for control, and work in small circular motions rather than straight lines.
Avoid quick direction changes and keep the sponge as flat as possible against the surface. Apply even pressure and wipe the area often to inspect your progress under good light.
As soon as it feels smooth or loses its 'bite.' A worn sponge takes longer and produces inconsistent results, so it's cheaper to swap early than to fix deep scratches later.
After your final grit, dampen the surface to raise the grain, let it dry, then lightly sand with the finest sponge. This removes fuzz and leaves a polished, silky feel.
Rinse it thoroughly with water and a stiff brush, then let it dry completely. For heavy clogging, a few drops of dish soap and a rinse can restore the grit surface.
Conclusion
Getting a truly smooth finish isn't about luck or elbow grease alone—it starts with matching the abrasive sponge grit to the stage of the job. Coarse grits cut fast but leave deep scratches; fine grits polish but can't remove heavy imperfections. Jumping straight from 80 to 220 grit skips the intermediate steps that gradually erase scratch marks, so the final surface still shows faint lines. Instead, work through the grits in sequence, letting each one remove the damage from the previous pass. Wet sanding adds another layer of control: it keeps dust out of the air, helps the abrasive glide without loading up, and reduces heat that can glaze the surface. You'll know you're doing it right when the slurry turns milky and the surface starts to feel slick under the sponge.
Many people press down hard, assuming more pressure means faster cutting. In reality, the abrasive grains need room to rotate and self-sharpen; excessive force flattens them and clogs the sponge. Use consistent, moderate pressure and let the grit do the work. Between passes, rinse the sponge and the workpiece thoroughly. Leftover particles from a coarser grit can get trapped under a finer one and carve new scratches. Edges deserve special attention too—rounded edges hide mistakes, but sharp corners and crisp lines reveal every skipped grit or uneven stroke. Slow down near the edges, keep the sponge flat, and check your progress in raking light. These small habits, repeated every time, are what separate a clouded finish from one that looks almost wet.
Contact Us
Contact Person: Amanda Wang
Email: [email protected]
Tel/WhatsApp: +86-13602569854
Website: https://www.sunabrasives.com.cn